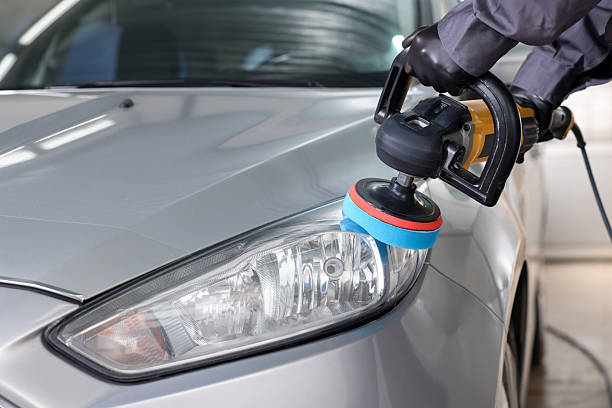
Cloudy headlights are one of those problems that creep up slowly until one night you realize the road ahead looks dimmer than it should. Yellowing plastic scatters light instead of focusing it, which cuts your visibility and makes the car look older than it is. Many drivers assume replacement is the only fix, but a proper polish restores most lenses for a fraction of that cost. Headlight polishing in White Bear Lake MN is a straightforward process when it is done in the right order with the right materials. Avion Detailing LLC handles this work regularly for local drivers. Here is the five-step method that produces a clear, lasting result.

Step One: Assess the Lens Before You Touch It
Not every cloudy headlight can be saved, and knowing that upfront prevents wasted effort. Run your fingernail across the surface and look closely at the damage pattern.

Surface haze versus internal damage
If the cloudiness sits on the outside and your nail catches slightly, polishing will work well. If the lens looks milky from the inside, moisture has entered the housing and polishing the outside will not fix it. That distinction decides whether you proceed or consider replacement.
Check for cracks and moisture
Look for hairline cracks, condensation beads, and discolored sealant around the edges. A cracked housing will fog up again within weeks no matter how well you polish it. Sealing those edges properly is part of a complete job, not an optional extra.
Step Two: Clean and Mask the Surrounding Paint
Polishing compound and sanding marks do not belong on your fenders. A few minutes of preparation protects the paint and keeps the job looking professional.
Wash and degrease first
Road film and bug residue clog the abrasive pads and reduce their effect. Wash the lens with a mild soap solution, rinse thoroughly, and dry it completely. Any grit left behind will scratch the plastic during sanding.
Tape off the paint and trim
Use painter’s tape around the edges of the headlight, covering the bumper and fender lines. Two layers give better protection against a slipping pad. This step takes three minutes and prevents hours of paint correction later.
Step Three: Sand in Stages, Wet and Even
Sanding removes the oxidized layer and levels the surface. Rushing this stage is the most common reason a polish job looks uneven or fades quickly.
Why grit progression matters
Start with a coarser grit to cut through the yellowing, then step up to finer grits to remove the scratches left behind. Skipping a stage leaves sanding marks that no polish can hide. Keep the surface wet throughout and wipe frequently to check progress.
Keeping the surface wet
Wet sanding keeps the abrasive from clogging and prevents heat buildup that can distort the plastic. Spray water regularly and work in small sections rather than trying to cover the whole lens at once. Even, overlapping passes produce a consistent finish.
Step Four: Polish and Refine the Clarity
Once the sanding marks are uniform, the polishing stage brings back the clarity. This is where the lens goes from dull to clear.
Choosing the right compound
A dedicated plastic polish works better than a general paint compound on headlights. Apply it with a soft foam pad at moderate speed and keep the pad moving. Work in overlapping passes until the surface looks clear under a bright light.
Removing polish residue properly
Wipe the residue with a clean microfiber cloth and inspect the lens from several angles. Any remaining haze means another polishing pass is needed. Do not apply the protective coating over leftover residue, because it will trap the haze underneath.
Step Five: Seal the Lens to Protect the Result
Polished plastic oxidizes again quickly without protection. The sealant is what separates a job that lasts a season from one that lasts years.
UV protection options compared
Different sealants behave differently in sun and weather, and the choice affects how long the clarity holds.

| Protection type | Durability | Best for |
|---|---|---|
| Spray sealant | Three to six months | Quick touch-ups |
| Ceramic coating | One to two years | Long-term clarity |
| Clear film | Three or more years | Maximum protection |
| UV clear coat | One to two years | Restoring factory finish |
Application tips that matter
Apply the coating in a shaded area with the lens completely dry. Use thin, even layers rather than one heavy coat, and allow proper cure time between layers. Follow the product’s instructions for temperature, because cold weather slows curing and can leave streaks.
Common Mistakes That Ruin a Polish Job
Most failed headlight jobs share the same handful of errors. Avoiding them is easier than correcting the damage afterward.
Skipping grits and rushing passes
Jumping from a coarse grit straight to polish leaves deep scratches visible in sunlight. Each grit exists to remove the marks left by the one before it. Skipping a stage saves ten minutes and costs the whole result.
Polishing in direct sunlight
Heat makes the compound dry too fast and the pad grab unevenly. Work in shade or on a cloudy day, and keep the surface cool throughout. A hot panel also makes the polish difficult to remove cleanly.
Forgetting the sealant entirely
An unsealed lens begins oxidizing again within weeks, and the driver often blames the polish. The sealant is not an upsell, it is the step that makes the work last. Never finish without it.
When to Bring It to a Professional
Some jobs are worth doing yourself, and others are better handled by someone with the right equipment and experience. Knowing the difference saves both time and money.
Heavy oxidation and deep damage
Severely yellowed lenses need aggressive sanding that can easily go wrong by hand. Deep scratches and cracked housings often require replacement rather than polish. A professional can tell you within minutes which path makes sense.
What a professional service includes
- Full assessment of lens condition and housing seals.
- Multi-stage wet sanding with proper grit progression.
- Machine polishing for uniform clarity.
- UV coating applied in a controlled environment.
- Advice on ongoing care and maintenance intervals.
Caring for the Result After the Polish
A polished lens stays clear longer with minimal effort. Wash it with the rest of the car and avoid harsh degreasers that strip the coating. Reapply a spray sealant every few months as a top-up, especially before winter road salt arrives.
Park in shade when you can, since constant sun exposure accelerates oxidation. A car cover or covered parking during summer months extends the life of the coating considerably. These small habits cost almost nothing and protect the investment you just made.
Final Thoughts
Clear headlights improve safety, appearance, and resale value, and the process is not as complicated as it looks. Follow the five steps in order, take your time on the sanding, and never skip the sealant. That sequence produces a result that lasts.
Let experience handle the details
When you want Headlight polishing in White Bear Lake MN done properly the first time, choose a team that assesses the lens before quoting and seals the finish afterward. Professional work protects the result through winter and keeps your lights bright for the road ahead.
Frequently Asked Questions
How long does headlight polishing last?
With a quality UV coating, results typically last one to two years, and clear film can extend that further. Spray sealants offer shorter protection and need reapplication every few months. Parking in shade and regular washing help the finish hold up longer.
Can polishing fix a headlight with condensation inside?
Polishing alone will not fix moisture inside the housing. The seal must be repaired or the housing replaced before the lens fogs again. A technician can check the seal and recommend whether repair or replacement makes more sense.
Is polishing cheaper than replacing headlights?
Usually yes, often by a wide margin. Replacement assemblies can cost hundreds of dollars per side, while polishing restores most lenses for a fraction of that. Polishing also preserves the original factory housing and fitment.
How often should headlights be polished?
Most vehicles benefit from polishing every two to three years depending on sun exposure and parking habits. Coastal or snowy regions with road salt may need it slightly more often. Regular washing and a top-up sealant extend the interval.